Introduction
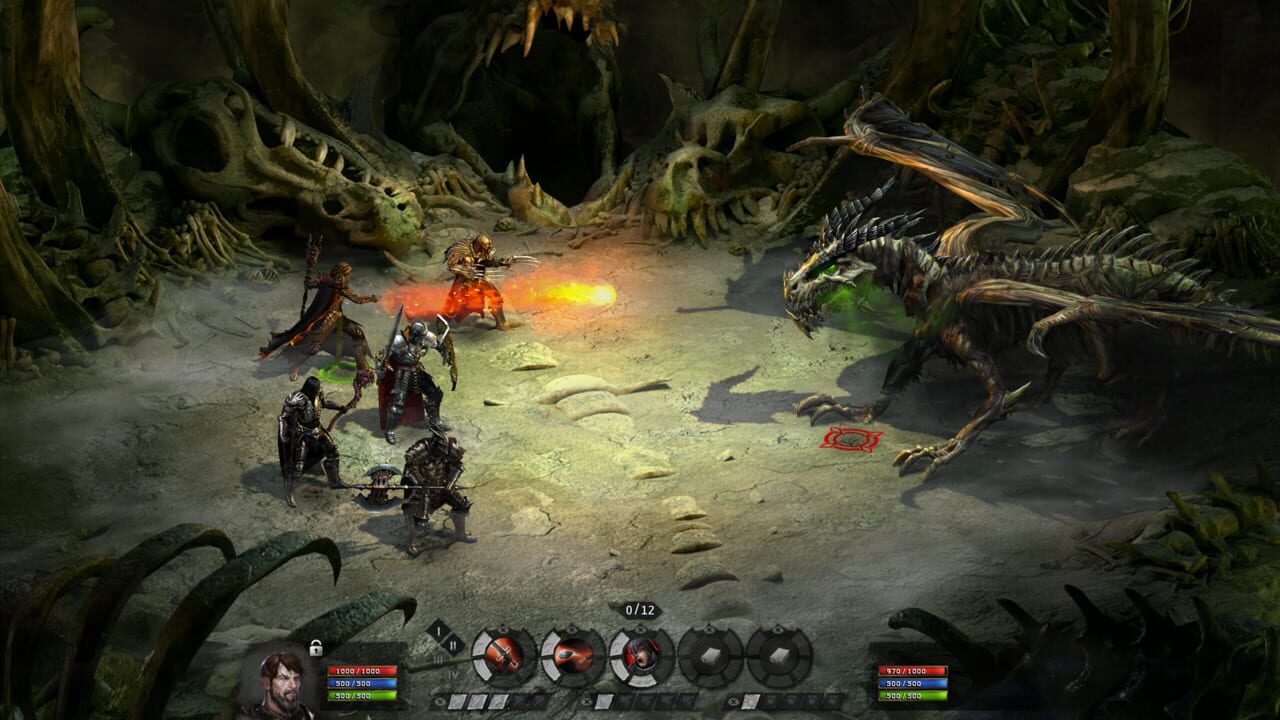
The Castle Specter is a tough solo boss in Broken Ranks, and it is one of the best sources for the Ghostly Bow. Archers have a natural advantage here because of range and mobility. This guide walks through the verified strategy — skill setup, stat choices, movement patterns, and the combat loop you need to clear the fight without a party.
Note: This guide is verified as of July 2026. Always check the latest patch notes, as boss mechanics and skill behavior can change.
The Loadout
Your build shapes everything in this encounter. Here is the confirmed setup:
- Class: Archer
- Primary Skill: Ice Arrow — The slow effect is the key to surviving this fight. It keeps the boss at range while you reposition. Without it, the encounter becomes significantly harder.
- Support Skills: Use a high-damage single-target skill alongside Ice Arrow. A dash or evasive roll skill is also important for quick repositioning between shots.
- Stats: Focus on Agility for movement speed and attack cadence, then invest in Stamina to sustain dodge rolls through longer fights. A balanced approach here lets you stay mobile and survive mistakes.
Combat Strategy
The fight revolves around consistent kiting and line of sight management. There is no room for standing still and trading blows — every moment you spend stationary increases your risk.
1. The Pull and Initial Kiting
Open by firing a max-range Ice Arrow the moment you engage. This applies the slow immediately and gives you the space to move. Head toward one of the arena corners. The pattern is simple: fire one arrow, then move. Do not chase extra shots between positional resets. The boss will track you, so keep it at maximum range while the slow ticks down its movement speed.
2. Reading and Avoiding Scream
The Castle Specter’s Scream is its most dangerous ability. It is a high-damage area attack that targets anyone in line of sight.
- The Tell: Watch for the boss to freeze briefly and emit a short glow. This signals that Scream is charging and will fire soon.
- The Counter: Dash behind a corner of the arena immediately. Breaking line of sight completely nullifies the attack — it deals zero damage when blocked by terrain. You do not need to hide; you only need to ensure the boss cannot draw a direct line to you.
- The Risk: If you fail to break line of sight and get hit by Scream, you will be stunned. A stunned Archer in this fight will almost certainly die, as the boss closes distance and punishes hard.
This pattern repeats the entire fight. Survival depends on reading the tell, reacting fast, and never hesitating on the dash.
3. Sustaining Damage and Loot
While kiting, apply Ice Arrow as often as its cooldown allows to keep the slow active. Between shots, reposition toward the next corner to set up for the next Scream cycle. The rhythm — shot, move, corner, wait, repeat — is the core loop.
The reward for mastering this is the Ghostly Bow, dropped exclusively by the Castle Specter. This weapon adds value well beyond this single fight.
Deep Dive: Ice Arrow Mechanics
Understanding how Ice Arrow functions at a mechanical level will sharpen your execution significantly.
The slow effect from Ice Arrow applies a movement speed reduction that stacks cumulatively. Each fresh application extends the duration and refreshes the potency. The key insight is that the slow decays over time — if you miss a reapplication, the boss gradually returns to full movement speed. This is why consistency matters more than raw damage output. Even a brief window where the slow has faded can let the Castle Specter close the distance and punish you.
To maintain optimal uptime, aim to recast Ice Arrow just as the previous application begins to drop off — usually right before you reach the next corner. This creates a smooth chain of slow effects with minimal gaps. Practice the timing until it becomes instinctive.
Additionally, Ice Arrow’s projectile travels at a speed that requires leading your shots against a moving target. When the boss is kiting toward you despite the slow, factor in its residual velocity and aim slightly ahead. Missing Ice Arrow applications wastes cooldown windows and leaves you vulnerable.
Positioning and Arena Control
Arena geometry is your second most important tool after Ice Arrow. The Castle Specter fight takes place in a structured arena with distinct corners and partial cover objects. Mastering positional awareness separates players who farm efficiently from those who struggle.
Corner Rotation System
The most effective rotation involves four corners arranged around the arena perimeter. The recommended flow is:
- Start at Corner A — fire Ice Arrow, then move toward Corner B.
- At Corner B — fire a damage skill, then advance toward Corner C.
- At Corner C — apply Ice Arrow again if the slow has expired, then move toward Corner D.
- At Corner D — fire your highest-damage skill and reposition back toward Corner A.
This creates a clockwise or counterclockwise circuit that keeps you constantly moving while maintaining safe angles. Never backtrack across the open center of the arena — it exposes you to Scream with no cover available.
Using Partial Cover
Between the four primary corners, some arena edges feature partial pillars or wall segments. These provide intermittent line of sight blocking and can serve as emergency shelter if you misjudge a Scream rotation. However, they are not as reliable as full corners — the boss may still draw a partial line of sight around the edges. Treat partial cover as a backup option, not a primary strategy.
Center Awareness
The center of the arena is a death zone. If you ever find yourself there, move immediately toward the nearest corner along a diagonal path. Standing in the open gives the Castle Specter multiple attack options and removes your escape routes.
Consumables and Preparation
Coming into this fight prepared makes a meaningful difference in your consistency and survivability.
Recommended Consumables
- Stamina Potions — Your dodge economy is everything. Running out of stamina during a Scream dodge is catastrophic. Stock up before each attempt.
- Health Potions — Keep at least two ready. A well-timed health potion after a near-miss can prevent a cascade of bad outcomes.
- Movement Speed Consumables — If your build allows it, any temporary movement speed boost extends your kiting window and helps you reach corners faster.
Pre-Fight Setup
Before engaging the Castle Specter, verify the following:
- All skills are at maximum available ranks.
- Your equipment has no durability penalties that could affect performance.
- Your stamina regeneration and recovery settings feel comfortable for extended dodging.
- You have memorized the four-corner rotation layout of the arena.
Skipping this preparation is a common reason players fail on their first attempts. A few minutes of verification upfront prevents repeated deaths and wasted resources.
Common Mistakes and How to Fix Them
Even experienced players fall into predictable traps during this fight. Recognizing these patterns early will accelerate your progress.
Greed Shooting
The most frequent mistake is firing extra arrows between positional resets. You land one or two bonus shots, feel good about the damage, and suddenly you are twenty feet from the next corner with no escape route when Scream charges. Fix: Commit to exactly one arrow per reposition. Damage will drop slightly, but your survival rate will climb dramatically.
Slow Decay Blindness
Players often assume Ice Arrow is still active when it has actually expired. The visual effect fades gradually, making it easy to misjudge. A boss that has recovered full movement speed will close distance rapidly and catch you off guard.
Fix: Set a mental timer or use a subtle visual cue. If you are unsure whether the slow is active, fire another Ice Arrow proactively. The worst outcome is a brief cooldown delay — far better than being outrun.
Panic Rolling Into Walls
When Scream charges and you fumble the corner dash, some players roll in a random direction out of panic. This often sends them directly into the boss or into a wall with no mobility recovery.
Fix: Train yourself to always dash toward the nearest corner, regardless of panic. Muscle memory overrides confusion. If you miss the first dodge, save your remaining stamina for an emergency evasive roll rather than burning everything at once.
Ignoring Stamina Management
Some players use all their dodge rolls during the initial engagement and then find themselves helpless when Scream arrives mid-fight. Stamina is a finite resource, and overspending it early is a leading cause of mid-fight deaths.
Fix: Use only the stamina you need for each reposition. Preserve at least one full dodge roll at all times for emergency Scream evasion. Think of your stamina as a budget — every point spent on routine movement is a point unavailable for survival.
Gear and Stat Optimization
Your gear supports the build and directly affects your performance in this encounter.
| Slot | Priority | Notes |
|---|---|---|
| Weapon | Ghostly Bow (post-farm) / any high-DPS bow | Ice Arrow scales with weapon damage |
| Armor | Light armor with Stamina bonuses | Survivability matters more than heavy mitigation |
| Boots | Movement speed or Agility focused | Outrunning the boss is your primary defense |
| Accessory | Stamina regeneration or cooldown reduction | Sustains your dodge roll economy |
| Ring/Amulet | Agility or critical chance | Maximizes DPS during safe windows |
Focus your stat allocation on Agility first, then Stamina. These two stats define your survivability ceiling for this fight. Points in Strength or Intelligence do not contribute meaningfully to Archer damage output.
Fight Pacing and Phase Awareness
The Castle Specter fight does not have dramatic phase transitions, but pacing still matters. The early portion of the encounter tests your positioning fundamentals. The middle stretches demand sustained stamina management. The late stage rewards patience — the boss’s health pool depletes steadily if you maintain the loop without major mistakes.
If you find yourself repeatedly dying at the same point in the fight, analyze whether the issue is a positioning error, a stamina shortage, or a misread Scream tell. Each failure point has a specific fix. Isolating the problem prevents you from masking symptoms with retry-after-retry approaches.
Summary
Keep Ice Arrow applied at all times. Hug the corners to break line of sight and dodge Scream. Never stand still. Master this routine and you will farm the Ghostly Bow efficiently as a solo Archer.
FAQ
Q: Can I solo Castle Specter without Ice Arrow? A: It is not recommended. Ice Arrow’s slow effect is the foundation of this strategy. Without it, you cannot maintain the distance needed to safely kite the boss.
Q: What stats should I prioritize? A: Agility and Stamina. Agility improves movement speed, and Stamina sustains your dodge rolls through prolonged engagements.
Q: How do I avoid the Scream attack? A: Watch for the boss stopping and glowing briefly — that is the tell. Dash behind a corner to break line of sight. The attack deals zero damage when blocked by terrain.
Q: Is Ghostly Bow worth the farm? A: Yes. It is a valuable weapon drop and makes future solo content easier through improved survivability and control.
Q: How do I maintain Ice Arrow uptime without wasting cooldowns? A: Recast Ice Arrow just as the previous application begins to fade, ideally while you are moving between corners. This creates a smooth chain with minimal gaps. If you are ever unsure whether the slow is still active, fire proactively — the cooldown delay is far less punishing than losing the slow entirely.
Q: What should I do if I get caught out of position during Scream? A: Immediately burn your fastest dodge or dash skill toward the nearest corner or partial cover. Do not attempt to fight or wait it out. If you have stamina remaining after the initial dodge, save it for a secondary emergency roll. Never panic-roll in a random direction — always move toward known cover.
Discussion
0 commentsNo comments yet. Be the first!