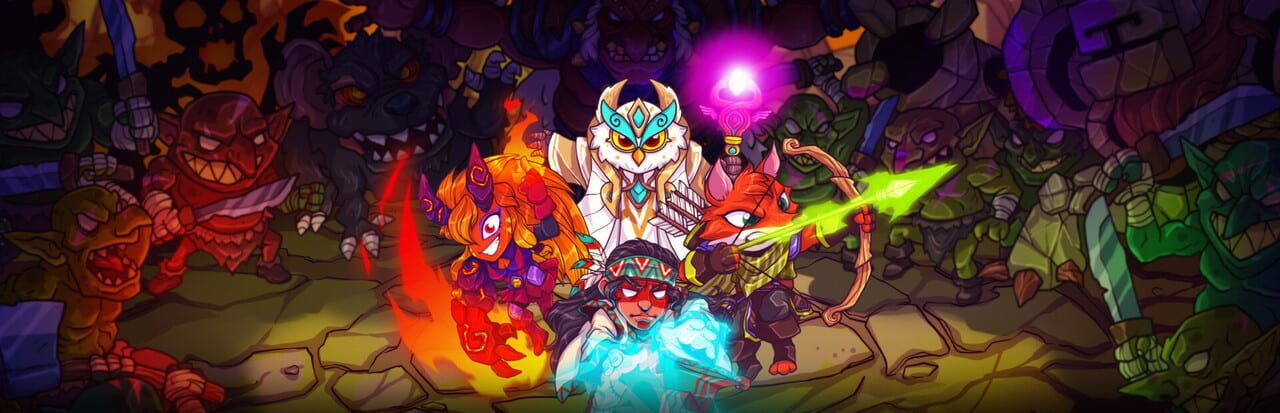
In Fellowship, the Construct class has emerged as the premier tank choice for Hard Mode expeditions. Built around a unique Scrap resource system, Constructs excel at absorbing massive damage when played with disciplined cooldown rotation. This guide covers everything you need to pull off the “Iron Plating” spec for prestige content.
Note: Verified as of July 2026. Check official patch notes for updates.
Core Philosophy: Scrap Management
Constructs use Scrap — a resource that passively decays over time. Unlike Mana or Rage systems in other MMOs, Scrap demands constant generation. Every second you spend not generating Scrap is a second you are vulnerable when your defensive cooldowns expire. The core loop is simple: generate Scrap with basic attacks and threat abilities, then spend it on mitigation when hits land. Mismanaging this economy is the #1 reason Construct tanks fall in Hard Mode.
Scrap Generation Sources
| Source | Scrap Generated | Notes |
|---|---|---|
| Basic Attack (Heavy) | 8–12 | Primary generation tool; always chain these between abilities |
| Basic Attack (Light) | 4–6 | Fill-in generator; saves Heavy attacks for larger Scrap returns |
| Threat Ability Use | 5–8 | Each threat skill generates Scrap on activation |
| Overclocked Shields Talent | Converts overflow | Turns wasted Scrap into active shield duration |
The critical insight is that Scrap has a hard cap. If you reach maximum Scrap and continue generating, the excess is lost entirely. This is why Overclocked Shields is non-negotiable — it recycles overflow into shield duration instead of burning it. In practice, most Hard Mode Construct tanks will hit the Scrap cap at least once per pull if they are not actively spending it on mitigation.
The Scrap Spend Cycle
Your ideal Scrap cycle follows this pattern:
- Generate — Land basic Heavy attacks between boss mechanics to build your Scrap reserve.
- Spend — Activate Scrap Shield before heavy hits connect using the 1–2 second prediction window.
- Recycle — If you have excess Scrap after shielding, let Overclocked Shields convert the overflow into additional shield duration.
- Repeat — Maintain this loop throughout the entire encounter.
Breaking this cycle by letting Scrap sit unused while also not having a shield active leaves you exposed. Always keep one mitigation ability on cooldown ready and the other available for emergency response.
Primary Stat Priority
| Stat | Role | Priority | Why |
|---|---|---|---|
| Constitution | HP Pool | ★★★★★ | Hard Mode bosses deal 15k+ unmitigated damage. You need a large buffer to survive burst windows. |
| Focus | Cooldown Reduction | ★★★★☆ | Essential for rotating your three major defensive cooldowns without long gaps. |
| Threat | Aggro Generation | ★★☆☆☆ | Only invest here if you are consistently losing aggro to DPS. Most of the time, base threat from your opener is sufficient. |
Do not spread points across all three equally. Constitution should be your first and highest investment. Focus comes second to keep your cooldown cycle tight. Threat is a situational fill-in stat.
Talent Tree: ‘Iron Plating’
The Iron Plating talent tree is the mandatory choice for Hard Mode tanking. It provides flat damage mitigation and survivability rather than offensive utility. Points spent elsewhere dilute your effectiveness.
Key Talents
-
Overclocked Shields — Converts any excess Scrap that would otherwise overflow into a shield lasting 10 seconds. This is your single most important talent. It turns resource waste into active defense and is what separates good Construct tanks from great ones.
-
Reinforced Exoskeleton — Grants +15% Physical Resistance. Hard Mode encounters feature heavy physical boss attacks, and this flat resistance reduces incoming damage across the entire fight. Stacking mitigation through talents is more reliable than hoping for gear drops.
Fill the remaining tree nodes into supplemental survivability talents that reduce incoming damage or improve Scrap generation. Avoid offensive or mobility talents — your job is to hold aggro and survive, not to damage or reposition frequently.
Supplemental Talent Recommendations
| Talent | Benefit | When to Take It |
|---|---|---|
| Scrapsmith’s Instinct | +10% Scrap generation from all sources | Early in the tree; synergizes with constant generation loop |
| Titan Bolts | Reduces incoming critical hit damage by 20% | Mid-tree; hard mode crit spikes can break through shields |
| Rusty Resolve | Increases max HP by 5% per 10% missing health | Late tree; emergency survivability for prolonged fights |
The Rotation
Opener (Aggro)
Your opening sequence establishes threat and controls enemy positioning immediately:
-
Rocket Salvo (Pull) — High threat AoE ability. Use this as your very first action to grab all nearby enemies. Without this opening, you risk DPS pulling aggro before you are in position.
-
Magnetic Pulse — Pulls all enemies within 10 meters to your location. This clusters enemies for your AoE mitigation and ensures the boss cannot walk away or sidestep the party.
-
Seismic Slam — Stuns trash mobs for 3 seconds. Activate this immediately after the pull completes. It prevents adds from interrupting your setup and gives your healers breathing room.
The three-step opener should execute in under two seconds. Hesitation at the start of a Hard Mode pull often results in party wipes.
Active Mitigation (Survival)
Once the pull lands, your mitigation rotation begins. These three abilities form your survival trinity:
-
Scrap Shield — Your bread and butter. Use this proactively whenever you see a Tank Buster or heavy-hit mechanic on the boss bar. Do not wait until the hit connects. Predict the timing and activate Shield 1–2 seconds early. This is the ability you will use most frequently throughout every encounter.
-
Repair Protocol — A burst heal that consumes all your remaining Scrap. Only activate this when your health drops below 40%. Using it earlier wastes Scrap that could be holding a Shield. This ability is a recovery tool, not a regular cooldown.
-
Emergency Override (Ultimate) — Grants 90% damage reduction for 8 seconds. Save this for enrage mechanics, boss phase transitions, or situations where the healer cannot keep up. This is your nuclear option. Using it too early or on minor damage spikes is the most common Construct mistake in Hard Mode content.
Advanced Mitigation Timing
Hard Mode encounters reward predictive play over reactive play. Learn the boss attack telegraphs:
- Visual cues — Boss weapons charging up, glowing indicators, or animation wind-ups signal an incoming heavy hit.
- Audio cues — Distinct sound effects precede Tank Busters and cleave attacks. Train your ear to recognize these.
- UI indicators — Boss bars sometimes show damage type icons. Physical icons paired with red coloring indicate attacks that will test your Scrap Shield.
Reaction time in Hard Mode is measured in fractions of a second. By predicting mechanics rather than reacting to them, you maintain shield uptime and conserve Scrap for unexpected spikes.
Hard Mode Positioning and Control Tips
Boss Positioning — Always tank bosses facing away from your group. Hard Mode cleave attacks deal enough damage to one-shot DPS characters. Keeping the boss oriented away from the party is as important as any cooldown management.
Add Management — When trash mobs spawn during a boss fight, use Seismic Slam to stun them briefly. Keep your Scrap Shield on cooldown for the boss mechanics. Do not let add handling drain your Scrap reserve below safe levels.
Pathing Discipline — Do not chase enemies. In Hard Mode, enemies have enough damage output that chasing them away from the group leaves your healers exposed. Hold your ground and kite aggressively only when explicitly needed.
Gear Benchmarks
| Slot | Priority Stat | Target Value | Notes |
|---|---|---|---|
| Weapon | Constitution | 500+ | Main stat weapon; threat scales adequately |
| Chest | Constitution/Focus | 600+/400+ | Balanced build for sustained pulls |
| Helmet | Constitution | 400+ | Survivability focus |
| Gloves | Focus | 350+ | Cooldown management matters more here |
| Boots | Constitution | 300+ | Mobility is secondary for tanks |
| Accessory | Constitution | 400+ | Fill remaining Constitution gap |
Gear should prioritize Constitution first, then Focus. Threat gear is unnecessary unless you are specifically losing aggro. Do not swap Constitution for Focus — the HP buffer is your primary survival tool.
Common Mistakes to Avoid
-
Letting Scrap sit at cap — If you are at max Scrap without a shield active, you are wasting resources. Spend before capping.
-
Using Repair Protocol too early — This ability consumes all your Scrap. Using it above 40% health is throwing away mitigation potential.
-
Spamming Emergency Override — This is your nuclear option. Save it for actual emergencies, not predictable damage spikes your Scrap Shield could handle.
-
Ignoring boss telegraphs — Predictive play wins Hard Mode. Watch for charges, glows, and sound cues rather than waiting for damage numbers.
-
Spreading stats evenly — Constitution should dominate your build.均衡 spread between Constitution and Focus leaves you squishier than needed.
FAQ
What is the best talent build for Construct tank in Fellowship Hard Mode? The Iron Plating talent tree is the optimal choice for Hard Mode Construct tanking, focusing on Overclocked Shields, Reinforced Exoskeleton, and supplemental survivability nodes.
How do I manage Scrap as a Construct tank in Fellowship? Generate Scrap with basic Heavy attacks and threat abilities, then spend it on Scrap Shield proactively before heavy hits land. Always keep Overflow conversion active with Overclocked Shields to prevent wastage.
What is the Construct tank rotation for Hard Mode dungeons in Fellowship? Start with Rocket Salvo pull, Magnetic Pulse cluster, and Seismic Slam stun. Then cycle Scrap Shield proactively, Repair Protocol below 40% HP, and save Emergency Override for boss enrage or healer overwhelm phases.
What stats should I prioritize for Construct tank gear in Fellowship 2026? Prioritize Constitution first (highest weight), then Focus for cooldown rotation, and only consider Threat if you are consistently losing aggro to DPS players.
Discussion
0 commentsNo comments yet. Be the first!